从Oracle 10g开始,Oracle 开始推广ASM的使用,到了11g,RAC 集群已经必须使用ASM,所以对ASM的掌握程度也决定RAC的运维水平,这篇Blog 演示 Oracle 12c 基于ASM 的单实例的的环境搭建。
这样即可以玩12c 的ASM,又不需要起2个集群,从而方便学习。具体环境搭建步骤如下。
1 安装需要的RPM 包
binutils-2.20.51.0.2-5.11.el6 (x86_64)
glibc-2.12-1.7.el6 (x86_64)
libgcc-4.4.4-13.el6 (x86_64)
libstdc++-4.4.4-13.el6 (x86_64)
libaio-0.3.107-10.el6 (x86_64)
libXext-1.1 (x86_64)
libXtst-1.0.99.2 (x86_64)
libX11-1.3 (x86_64)
libXau-1.0.5 (x86_64)
libxcb-1.5 (x86_64)
libXi-1.3 (x86_64)
make-3.81-19.el6
sysstat-9.0.4-11.el6 (x86_64)


compat-libcap1-1.10-1 (x86_64)
compat-libstdc++-33-3.2.3-69.el6 (x86_64)
gcc-4.4.4-13.el6 (x86_64)
gcc-c++-4.4.4-13.el6 (x86_64)
glibc-devel-2.12-1.7.el6 (x86_64)
ksh  <== 任何版本的 ksh 都可以。
libstdc++-devel-4.4.4-13.el6 (x86_64)
libaio-devel-0.3.107-10.el6 (x86_64)

compat-libstdc++-33-3.2.3-69.el6 (i686)
glibc-2.12-1.7.el6 (i686)
glibc-devel-2.12-1.7.el6 (i686)
libgcc-4.4.4-13.el6 (i686)
libstdc++-4.4.4-13.el6 (i686)
libstdc++-devel-4.4.4-13.el6 (i686)
libaio-0.3.107-10.el6 (i686)
libaio-devel-0.3.107-10.el6 (i686)
libXext-1.1 (i686)
libXtst-1.0.99.2 (i686)
libX11-1.3 (i686)
libXau-1.0.5 (i686)
libxcb-1.5 (i686)
libXi-1.3 (i686)
2 创建ASM disk 并用UDEV 绑定
创建6个3G 的disk,这个直接使用VirtualBox命令来创建。 创建之前需要先关闭虚拟机。
用如下脚本获取绑定脚本:
for i in b c d e f g;
do
echo "KERNEL==/"sd*/", BUS==/"scsi/", PROGRAM==/"/sbin/scsi_id -g -u  /dev//$name/", RESULT==/"`/sbin/scsi_id -g -u /dev/sd$i`/", NAME=/"12casm-disk$i/", OWNER=/"grid/", GROUP=/"asmadmin/", MODE=/"0660/""
done

KERNEL=="sd*", BUS=="scsi", PROGRAM=="/sbin/scsi_id -g -u  /dev/$name", RESULT=="1ATA_VBOX_HARDDISK_VB626d9087-8bf68e7e", NAME="12casm-diskb", OWNER="grid", GROUP="asmadmin", MODE="0660"
KERNEL=="sd*", BUS=="scsi", PROGRAM=="/sbin/scsi_id -g -u  /dev/$name", RESULT=="1ATA_VBOX_HARDDISK_VBf5a8c435-19b9adf9", NAME="12casm-diskc", OWNER="grid", GROUP="asmadmin", MODE="0660"
KERNEL=="sd*", BUS=="scsi", PROGRAM=="/sbin/scsi_id -g -u  /dev/$name", RESULT=="1ATA_VBOX_HARDDISK_VB13895f62-318c2cb4", NAME="12casm-diskd", OWNER="grid", GROUP="asmadmin", MODE="0660"
KERNEL=="sd*", BUS=="scsi", PROGRAM=="/sbin/scsi_id -g -u  /dev/$name", RESULT=="1ATA_VBOX_HARDDISK_VB5049991a-741b6a85", NAME="12casm-diske", OWNER="grid", GROUP="asmadmin", MODE="0660"
KERNEL=="sd*", BUS=="scsi", PROGRAM=="/sbin/scsi_id -g -u  /dev/$name", RESULT=="1ATA_VBOX_HARDDISK_VB6ad43135-cac8a708", NAME="12casm-diskf", OWNER="grid", GROUP="asmadmin", MODE="0660"
KERNEL=="sd*", BUS=="scsi", PROGRAM=="/sbin/scsi_id -g -u  /dev/$name", RESULT=="1ATA_VBOX_HARDDISK_VBe6fb6130-2a921dde", NAME="12casm-diskg", OWNER="grid", GROUP="asmadmin", MODE="0660"
将产生的结果添加到/etc/udev/rules.d/99-oracle-asmdevices.rules文件。
[root@12cAsm dave]#  start_udev
Starting udev: [  OK  ]
[root@12cAsm dave]#
--查看设备:
[root@12cAsm dave]# ll /dev/12casm*
brw-rw----. 1 grid asmadmin 8, 16 Nov 29 00:35 /dev/12casm-diskb
brw-rw----. 1 grid asmadmin 8, 32 Nov 29 00:35 /dev/12casm-diskc
brw-rw----. 1 grid asmadmin 8, 48 Nov 29 00:35 /dev/12casm-diskd
brw-rw----. 1 grid asmadmin 8, 64 Nov 29 00:35 /dev/12casm-diske
brw-rw----. 1 grid asmadmin 8, 80 Nov 29 00:35 /dev/12casm-diskf
brw-rw----. 1 grid asmadmin 8, 96 Nov 29 00:35 /dev/12casm-diskg
[root@12cAsm dave]#
至此配置结束,在ASM的配置中,ASM_DISKSTRING参数指向'/dev/asm-disk*'就可以了。
3 禁用防火墙和SELNUX
关闭防火墙:
service iptables status
service iptables stop
chkconfig iptables off
chkconfig iptables --list
设置/etc/selinux/config 文件,将SELINUX设置为disabled。
4 创建目录结构
mkdir -p /u01/grid
mkdir -p /u01/app/grid/12.1.0
chown -R grid:oinstall /u01

mkdir -p /u01/app/oracle/12.1.0/db_1
chown -R oracle:oinstall /u01/app/oracle
chmod -R 775 /u01
5 添加组和用户并设置环境变量
groupadd -g 1000 oinstall
groupadd -g 1200 asmadmin
groupadd -g 1201 asmdba
groupadd -g 1202 asmoper
groupadd -g 1300 dba
groupadd -g 1301 oper
useradd -m -u 1100 -g oinstall -G asmadmin,asmdba,asmoper,dba -d /home/grid -s /bin/bash grid
useradd -m -u 1101 -g oinstall -G dba,oper,asmdba -d /home/oracle -s /bin/bash oracle
确认用户信息:
[root@rac1 ~]# id oracle
uid=502(oracle) gid=507(oinstall) groups=507(oinstall),502(dba),503(oper),506(asmdba)
[root@rac1 ~]# id grid
uid=1100(grid) gid=507(oinstall) groups=507(oinstall),504(asmadmin),506(asmdba),505(asmoper)
修改密码:
passwd oracle
passwd grid
--Grid用户
修改grid用户的.bash_profile. 注意每个节点的不同内容:
export ORACLE_SID=+ASM
export ORACLE_BASE=/u01/grid
export ORACLE_HOME=/u01/app/grid/12.1.0
export PATH=$ORACLE_HOME/bin:$PATH:/usr/local/bin/:.
export TEMP=/tmp
export TMP=/tmp
export TMPDIR=/tmp
umask 022

--Oracle 用户
修改oracle 用户的.bash_profile,注意每个节点的不同内容:
ORACLE_SID=dave; export ORACLE_SID
ORACLE_UNQNAME=dave; export ORACLE_UNQNAME
JAVA_HOME=/usr/local/java; export JAVA_HOME
ORACLE_BASE=/u01/app/oracle; export ORACLE_BASE
ORACLE_HOME=$ORACLE_BASE/12.1.0/db_1; export ORACLE_HOME
ORACLE_TERM=xterm; export ORACLE_TERM
NLS_DATE_FORMAT="YYYY:MM:DD HH24:MI:SS"; export NLS_DATE_FORMAT
NLS_LANG=american_america.ZHS16GBK; export NLS_LANG
TNS_ADMIN=$ORACLE_HOME/network/admin; export TNS_ADMIN
ORA_NLS11=$ORACLE_HOME/nls/data; export ORA_NLS11
PATH=.:${JAVA_HOME}/bin:${PATH}:$HOME/bin:$ORACLE_HOME/bin:$ORA_CRS_HOME/bin
PATH=${PATH}:/usr/bin:/bin:/usr/bin/X11:/usr/local/bin
export PATH
LD_LIBRARY_PATH=$ORACLE_HOME/lib
LD_LIBRARY_PATH=${LD_LIBRARY_PATH}:$ORACLE_HOME/oracm/lib
LD_LIBRARY_PATH=${LD_LIBRARY_PATH}:/lib:/usr/lib:/usr/local/lib
export LD_LIBRARY_PATH
CLASSPATH=$ORACLE_HOME/JRE
CLASSPATH=${CLASSPATH}:$ORACLE_HOME/jlib
CLASSPATH=${CLASSPATH}:$ORACLE_HOME/rdbms/jlib
CLASSPATH=${CLASSPATH}:$ORACLE_HOME/network/jlib
export CLASSPATH
THREADS_FLAG=native; export THREADS_FLAG
export TEMP=/tmp
export TMPDIR=/tmp
umask 022
6 为安装用户设置资源限制
6.1 修改/etc/security/limits.conf
以 root 用户身份,在节点上,在 /etc/security/limits.conf 文件中添加如下内容,或者执行执行如下命令:
[root@12cAsm dave]# cat >> /etc/security/limits.conf <<EOF
> grid soft nproc 2047
> grid hard nproc 16384
> grid soft nofile 1024
> grid hard nofile 65536
> oracle soft nproc 2047
> oracle hard nproc 16384
> oracle soft nofile 1024
> oracle hard nofile 65536
> EOF
[root@12cAsm dave]#
6.2 修改/etc/pam.d/login
[root@12cAsm dave]# cat >> /etc/pam.d/login <<EOF
> session    required     pam_limits.so
> EOF
[root@12cAsm dave]#
6.3 shell 的限制
对默认的 shell 启动文件进行以下更改,以便更改所有 Oracle 安装所有者的 ulimit 设置:
[root@12cAsm dave]# cat >> /etc/profile <<EOF
> if [ /$USER = "oracle" ] || [ /$USER = "grid" ]; then
>     if [ /$SHELL = "/bin/ksh" ]; then
>         ulimit -p 16384
>         ulimit -n 65536
>     else
>         ulimit -u 16384 -n 65536
>     fi
>     umask 022
> fi
> EOF
[root@12cAsm dave]#
6.4 修改内核参数/etc/sysctl.conf
在sysctl.conf 中加入以下内容:
kernel.shmmni = 4096
kernel.sem = 250 32000 100 128
fs.file-max = 6815744
fs.aio-max-nr = 1048576
net.ipv4.ip_local_port_range = 9000 65500
net.core.rmem_default = 262144
net.core.rmem_max = 4194304
net.core.wmem_default = 262144
net.core.wmem_max = 1048576
kernel.panic_on_oops = 30
7 安装Clusterware
安装之前要确认/etc/hosts 配置:
[root@12cAsm dave]# cat /etc/hosts
127.0.0.1 localhost 12cAsm
不然会报错。
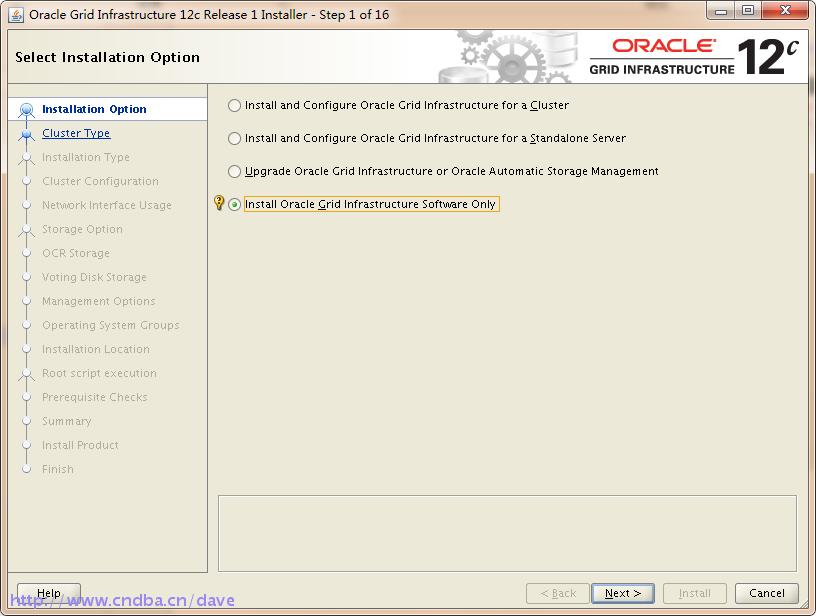
已grid 用户运行安装程序: runInstaller
…
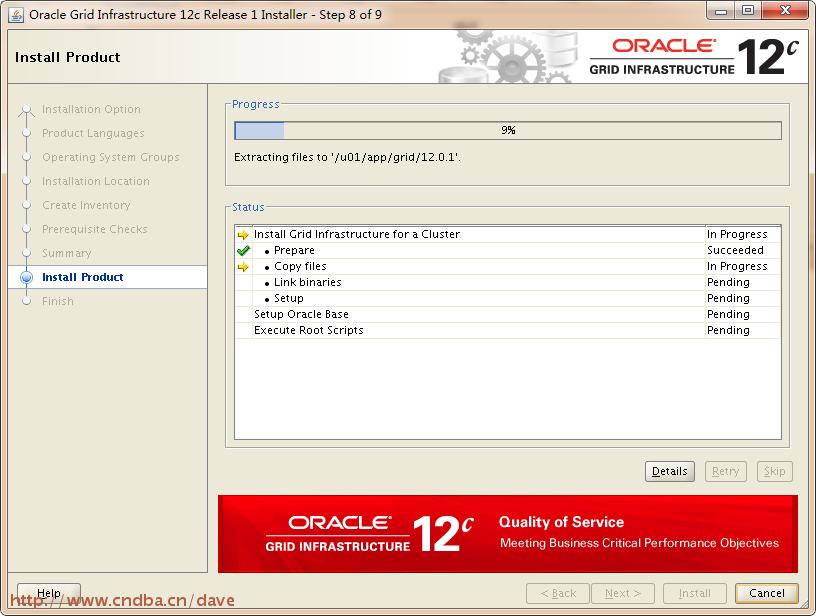
其他都是下一步的操作。 这里不截图了。
执行最后会让我们运行一个root.sh 脚本。
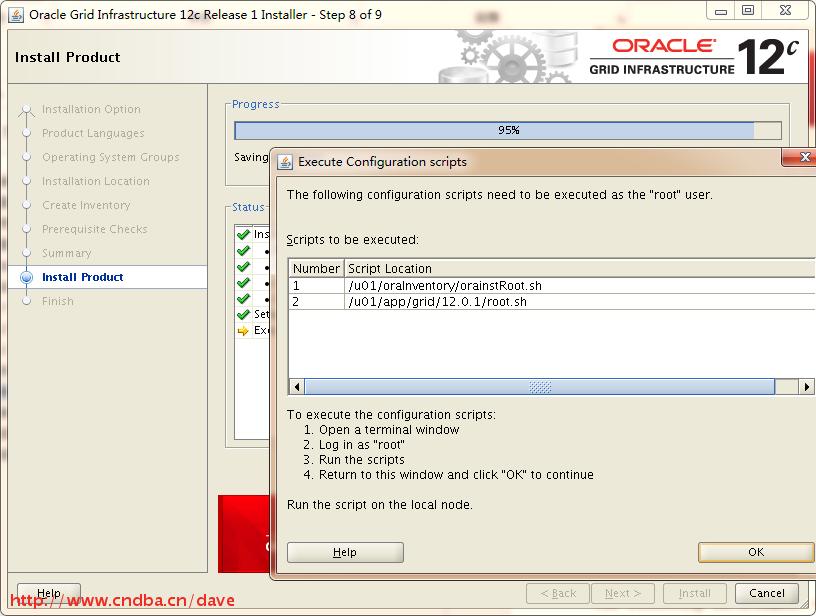
[root@12cAsm /]# /u01/oraInventory/orainstRoot.sh
Changing permissions of /u01/oraInventory.
Adding read,write permissions for group.
Removing read,write,execute permissions for world.

Changing groupname of /u01/oraInventory to oinstall.
The execution of the script is complete.
[root@12cAsm /]#


[root@12cAsm /]# /u01/app/grid/12.0.1/root.sh
Performing root user operation.

The following environment variables are set as:
    ORACLE_OWNER= grid
    ORACLE_HOME=  /u01/app/grid/12.0.1

Enter the full pathname of the local bin directory: [/usr/local/bin]:
   Copying dbhome to /usr/local/bin ...
   Copying oraenv to /usr/local/bin ...
   Copying coraenv to /usr/local/bin ...


Creating /etc/oratab file...
Entries will be added to the /etc/oratab file as needed by
Database Configuration Assistant when a database is created
Finished running generic part of root script.
Now product-specific root actions will be performed.

To configure Grid Infrastructure for a Stand-Alone Server run the following command as the root user:
/u01/app/grid/12.0.1/perl/bin/perl -I/u01/app/grid/12.0.1/perl/lib -I/u01/app/grid/12.0.1/crs/install /u01/app/grid/12.0.1/crs/install/roothas.pl


To configure Grid Infrastructure for a Cluster execute the following command as grid user:
/u01/app/grid/12.0.1/crs/config/config.sh
This command launches the Grid Infrastructure Configuration Wizard. The wizard also supports silent operation, and the parameters can be passed through the response file that is available in the installation media.

[root@12cAsm /]#

我们这里是单节点的ASM,所以执行如下SQL:
/u01/app/grid/12.0.1/perl/bin/perl -I/u01/app/grid/12.0.1/perl/lib -I/u01/app/grid/12.0.1/crs/install /u01/app/grid/12.0.1/crs/install/roothas.pl


[root@12cAsm /]# /u01/app/grid/12.0.1/perl/bin/perl -I/u01/app/grid/12.0.1/perl/lib -I/u01/app/grid/12.0.1/crs/install /u01/app/grid/12.0.1/crs/install/roothas.pl
Using configuration parameter file: /u01/app/grid/12.0.1/crs/install/crsconfig_params
LOCAL ADD MODE
Creating OCR keys for user 'grid', privgrp 'oinstall'..
Operation successful.
LOCAL ONLY MODE
Successfully accumulated necessary OCR keys.
Creating OCR keys for user 'root', privgrp 'root'..
Operation successful.
CRS-4664: Node 12casm successfully pinned.
2014/11/29 02:16:15 CLSRSC-330: Adding Clusterware entries to file 'oracle-ohasd.conf'


12casm     2014/11/29 02:17:09     /u01/app/grid/12.0.1/cdata/12casm/backup_20141129_021709.olr     0

CRS-2791: Starting shutdown of Oracle High Availability Services-managed resources on '12casm'
CRS-2673: Attempting to stop 'ora.evmd' on '12casm'
CRS-2677: Stop of 'ora.evmd' on '12casm' succeeded
CRS-2793: Shutdown of Oracle High Availability Services-managed resources on '12casm' has completed
CRS-4133: Oracle High Availability Services has been stopped.
CRS-4123: Oracle High Availability Services has been started.
2014/11/29 02:19:52 CLSRSC-327: Successfully configured Oracle Restart for a standalone server

[root@12cAsm /]#

--检查:
[root@12cAsm /]# ocrcheck
Status of Oracle Cluster Registry is as follows :
          Version                  :          4
          Total space (kbytes)     :     409568
          Used space (kbytes)      :        200
          Available space (kbytes) :     409368
          ID                       : 1150490114
          Device/File Name         : /u01/app/grid/12.0.1/cdata/localhost/local.ocr
                                    Device/File integrity check succeeded

                                    Device/File not configured

                                    Device/File not configured

                                    Device/File not configured

                                    Device/File not configured

          Cluster registry integrity check succeeded

          Logical corruption check succeeded

[root@12cAsm /]#


[root@12cAsm /]# crsctl status res -t
--------------------------------------------------------------------------------
Name           Target  State        Server                   State details
--------------------------------------------------------------------------------
Local Resources
--------------------------------------------------------------------------------
ora.ons
               OFFLINE OFFLINE      12casm                   STABLE
--------------------------------------------------------------------------------
Cluster Resources
--------------------------------------------------------------------------------
ora.cssd
      1        OFFLINE OFFLINE                               STABLE
ora.diskmon
      1        OFFLINE OFFLINE                               STABLE
ora.evmd
      1        ONLINE  ONLINE       12casm                   STABLE
--------------------------------------------------------------------------------
[root@12cAsm /]#
8 安装Oracle 软件
以Oracle 用户执行安装程序。
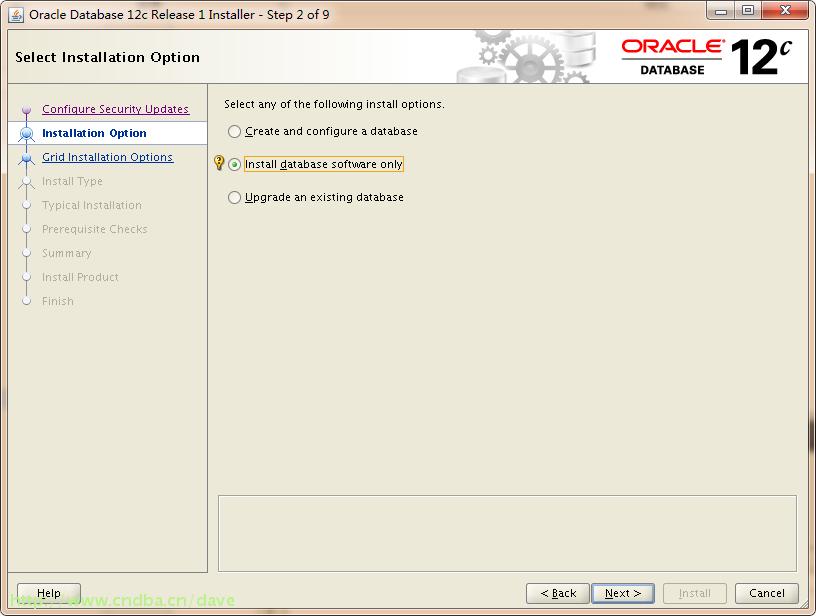
注意,选择只安装数据库软件。
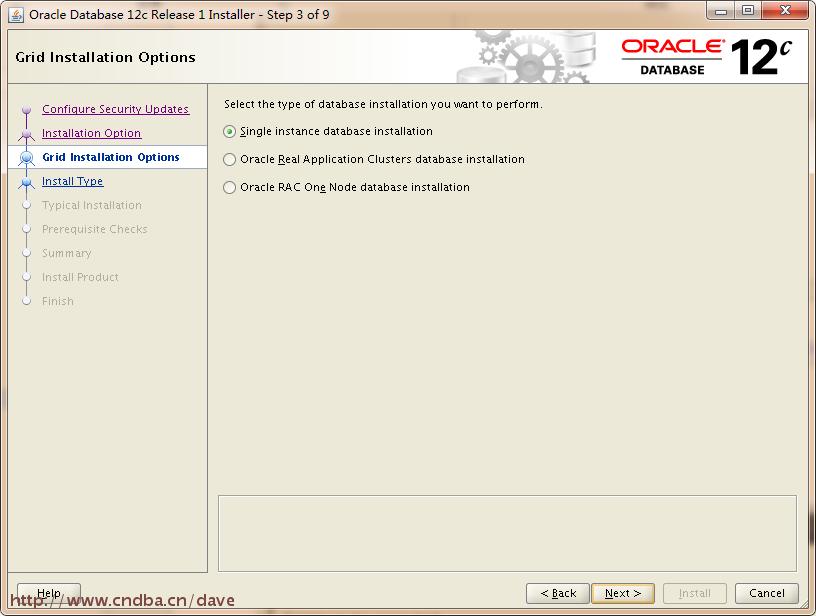
然后都是下一步的操作。
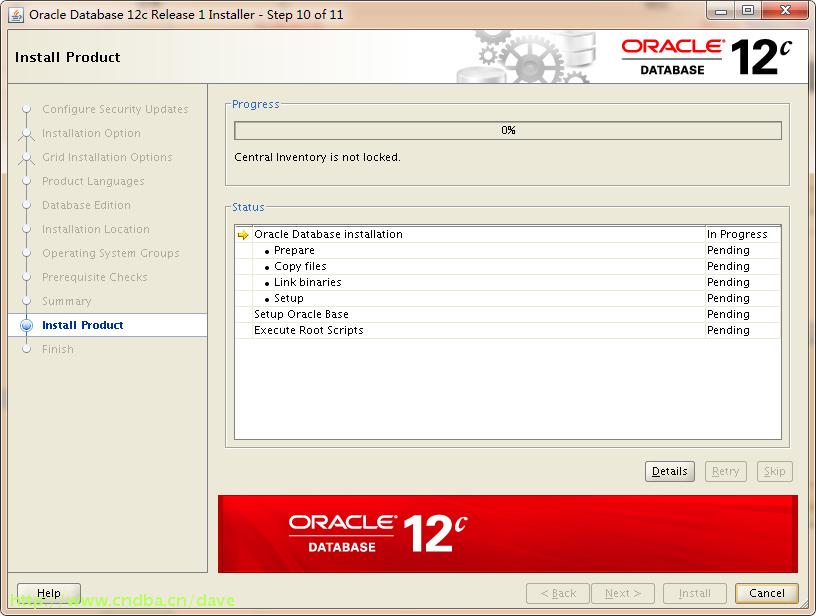
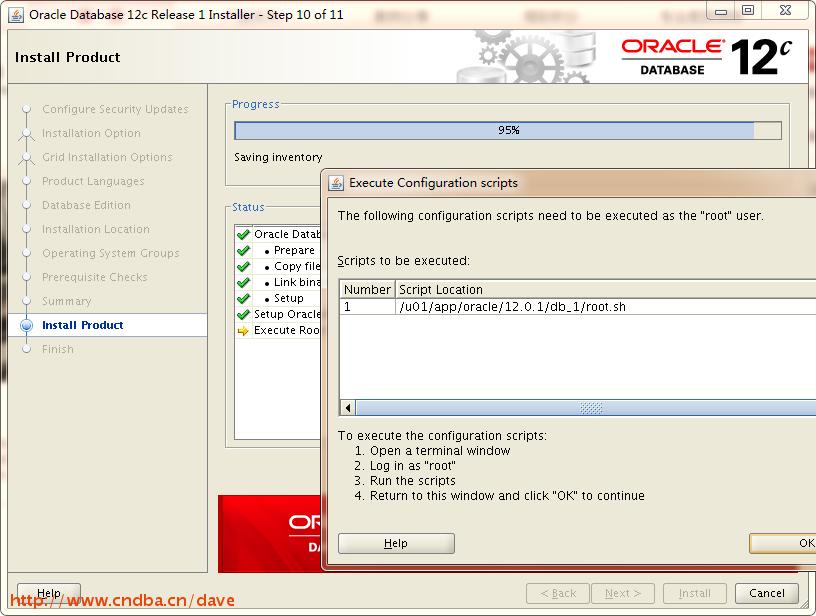
执行脚本:
[root@12cAsm /]# /u01/app/oracle/12.0.1/db_1/root.sh
Performing root user operation.

The following environment variables are set as:
    ORACLE_OWNER= oracle
    ORACLE_HOME=  /u01/app/oracle/12.0.1/db_1

Enter the full pathname of the local bin directory: [/usr/local/bin]:
The contents of "dbhome" have not changed. No need to overwrite.
The contents of "oraenv" have not changed. No need to overwrite.
The contents of "coraenv" have not changed. No need to overwrite.

Entries will be added to the /etc/oratab file as needed by
Database Configuration Assistant when a database is created
Finished running generic part of root script.
Now product-specific root actions will be performed.
[root@12cAsm /]#
9 创建ASM DISK GROUPS
使用grid用户执行asmca,创建磁盘组Data。

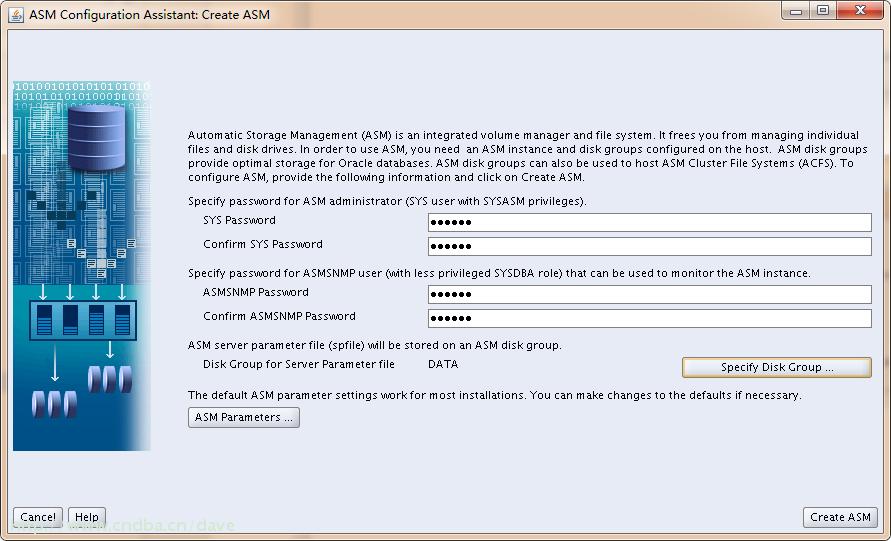
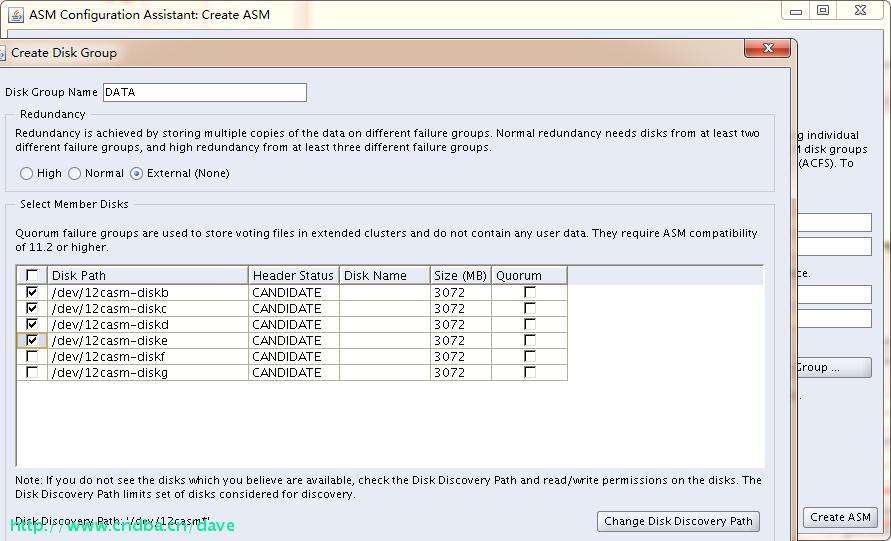


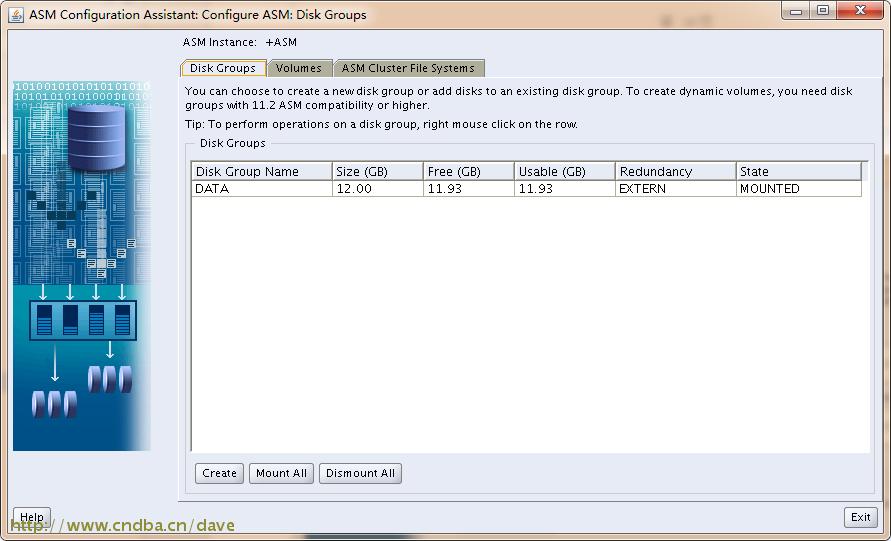
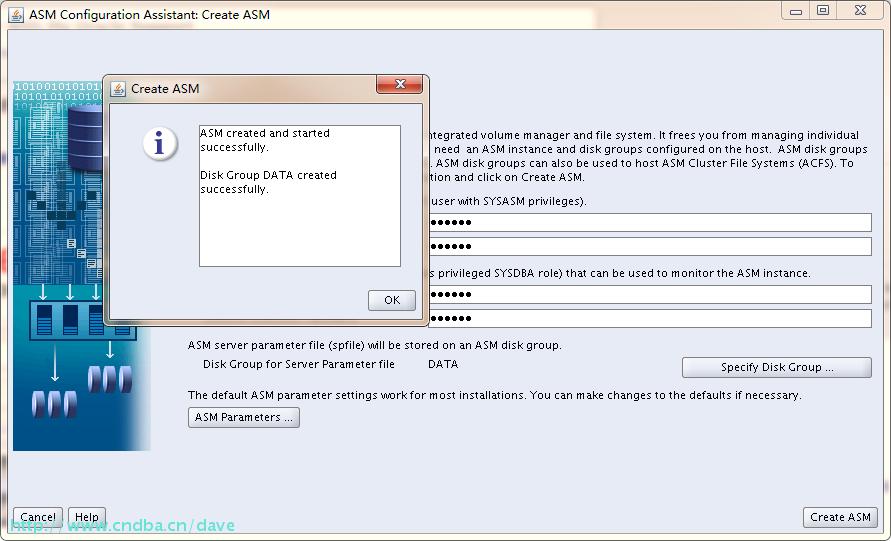
ASM disk group 搞定。
检查ASM DISK GROUPS的情况:
[grid@12cAsm bin]$ crsctl status res -t
--------------------------------------------------------------------------------
Name           Target  State        Server                   State details
--------------------------------------------------------------------------------
Local Resources
--------------------------------------------------------------------------------
ora.DATA.dg
               ONLINE  ONLINE       12casm                   STABLE
ora.asm
               ONLINE  ONLINE       12casm                   Started,STABLE
ora.ons
               OFFLINE OFFLINE      12casm                   STABLE
--------------------------------------------------------------------------------
Cluster Resources
--------------------------------------------------------------------------------
ora.cssd
      1        ONLINE  ONLINE       12casm                   STABLE
ora.diskmon
      1        OFFLINE OFFLINE                               STABLE
ora.evmd
      1        ONLINE  ONLINE       12casm                   STABLE
--------------------------------------------------------------------------------
[grid@12cAsm bin]$
10 创建基于ASM 的数据库实例
先运行netmgr,创建数据库监听:
已oracle 用户运行dbca,创建实例。
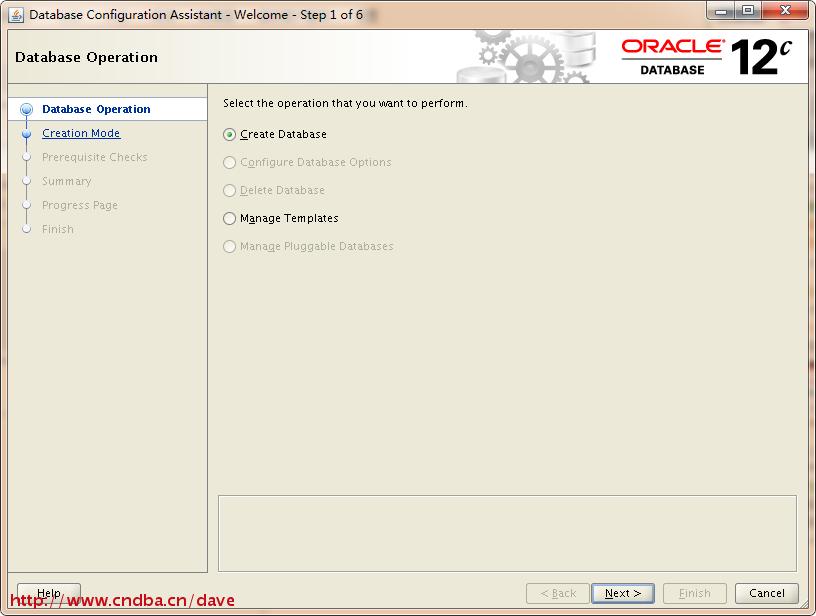
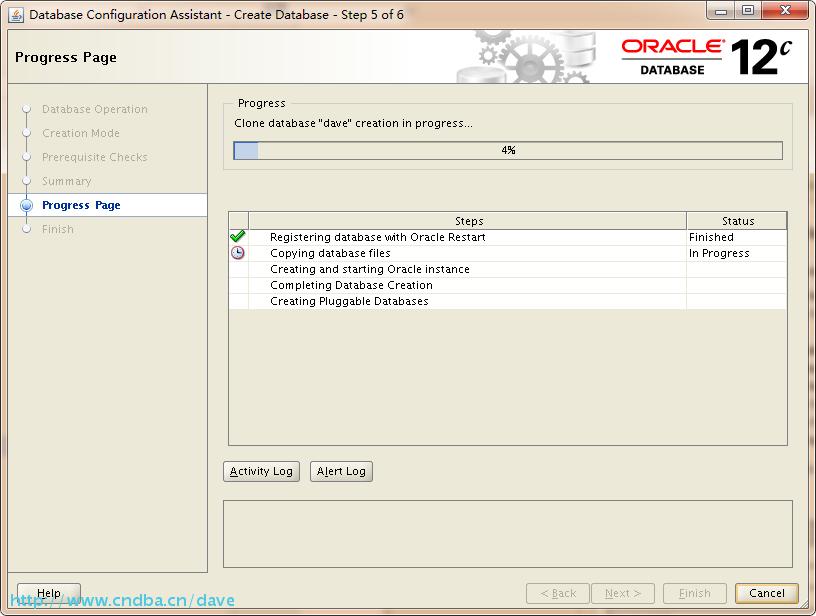
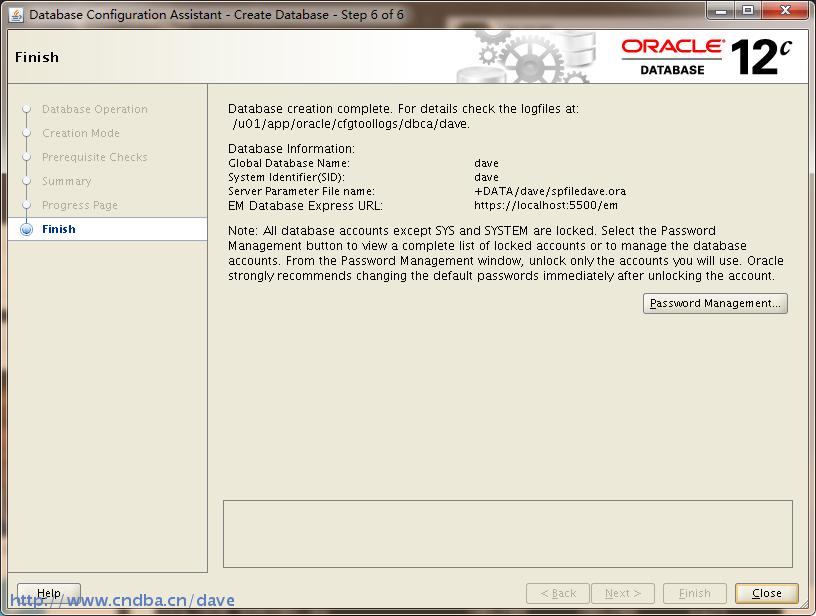
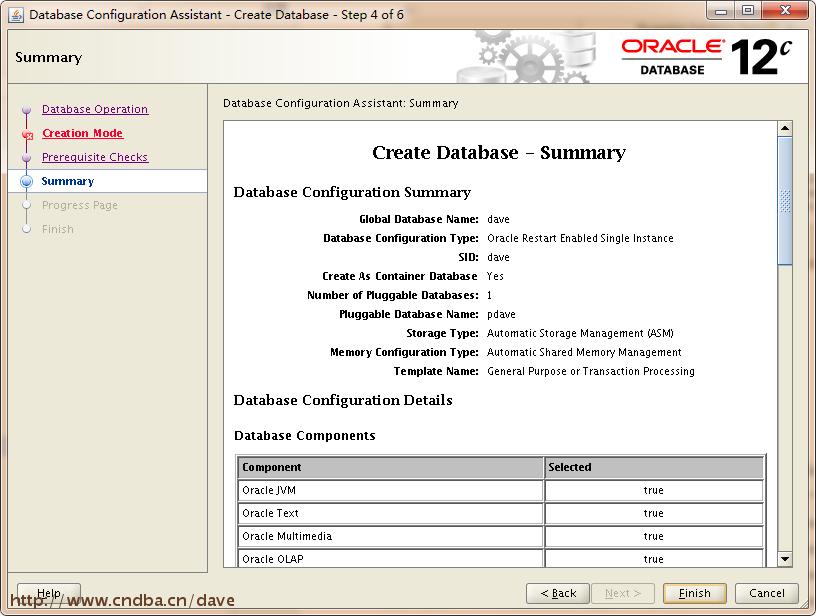
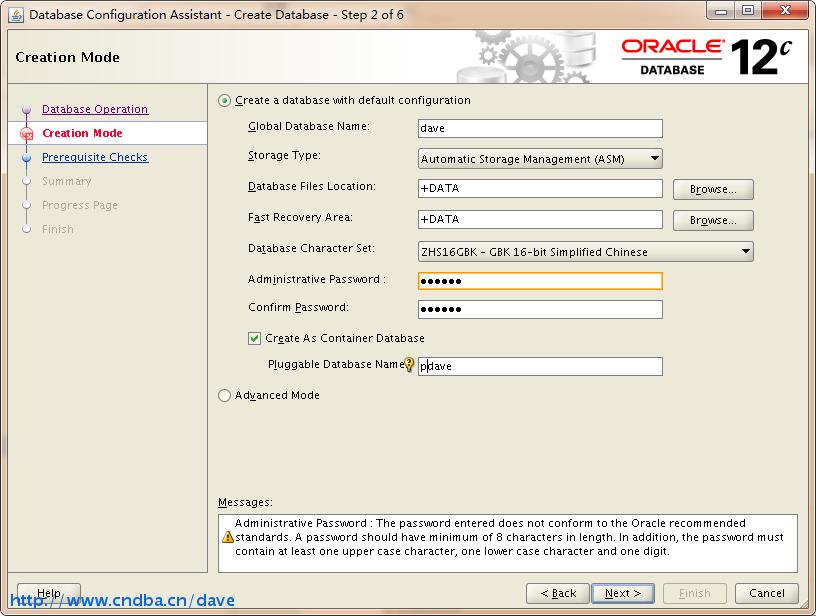
然后直接直接下一步下一步,就ok了。
11 验证
[grid@12cAsm bin]$ crsctl status res -t
--------------------------------------------------------------------------------
Name           Target  State        Server                   State details
--------------------------------------------------------------------------------
Local Resources
--------------------------------------------------------------------------------
ora.DATA.dg
               ONLINE  ONLINE       12casm                   STABLE
ora.asm
               ONLINE  ONLINE       12casm                   Started,STABLE
ora.ons
               OFFLINE OFFLINE      12casm                   STABLE
--------------------------------------------------------------------------------
Cluster Resources
--------------------------------------------------------------------------------
ora.cssd
      1        ONLINE  ONLINE       12casm                   STABLE
ora.dave.db
      1        ONLINE  ONLINE       12casm                   Open,STABLE
ora.diskmon
      1        OFFLINE OFFLINE                               STABLE
ora.evmd
      1        ONLINE  ONLINE       12casm                   STABLE
--------------------------------------------------------------------------------
[grid@12cAsm bin]$


[oracle@12cAsm ~]$ sqlplus / as sysdba

SQL*Plus: Release 12.1.0.2.0 Production on Sat Nov 29 15:09:37 2014

Copyright (c) 1982, 2014, Oracle.  All rights reserved.


Connected to:
Oracle Database 12c Enterprise Edition Release 12.1.0.2.0 - 64bit Production
With the Partitioning, Automatic Storage Management, OLAP, Advanced Analytics
and Real Application Testing options

SQL> set lin 140
SQL> select * from v$version;

BANNER                                           CON_ID
-------------------------------------------------------------------------------- ----------
Oracle Database 12c Enterprise Edition Release 12.1.0.2.0 - 64bit Production          0
PL/SQL Release 12.1.0.2.0 - Production                            0
CORE    12.1.0.2.0  Production                                0
TNS for Linux: Version 12.1.0.2.0 - Production                        0
NLSRTL Version 12.1.0.2.0 - Production                            0

SQL> show con_name

CON_NAME
------------------------------
CDB$ROOT
SQL> col pdb_name for a20
SQL> select PDB_NAME,CON_UID,pdb_id,status from dba_pdbs;

PDB_NAME               CON_UID     PDB_ID STATUS
-------------------- ---------- ---------- ---------
PDAVE                    1778789142           3 NORMAL
PDB$SEED             1845119286           2 NORMAL

SQL> select con_id,dbid,NAME,OPEN_MODE from v$pdbs;

    CON_ID    DBID NAME                          OPEN_MODE
---------- ---------- ------------------------------ ----------
          2 1845119286 PDB$SEED                              READ ONLY
          3 1778789142 PDAVE                            READ WRITE

SQL>
版权声明:本文为博主原创文章,未经博主允许不得转载。


